...
- Start the Joget Server and open the App Center.
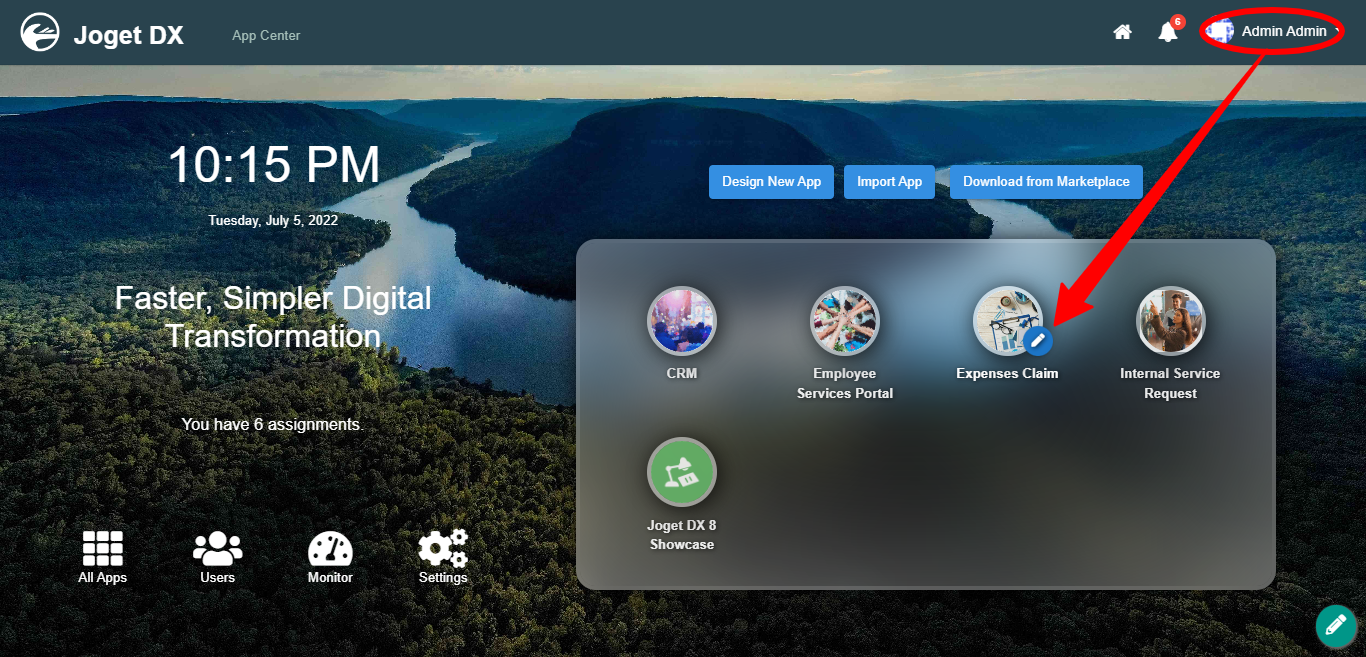
- Log in as admin and click on the pencil icon on the Expenses Claim to open the Design App. (see Figure 1)
Figure 1 - Click on Expense Claim Form and you will be directed to the Form Builder.
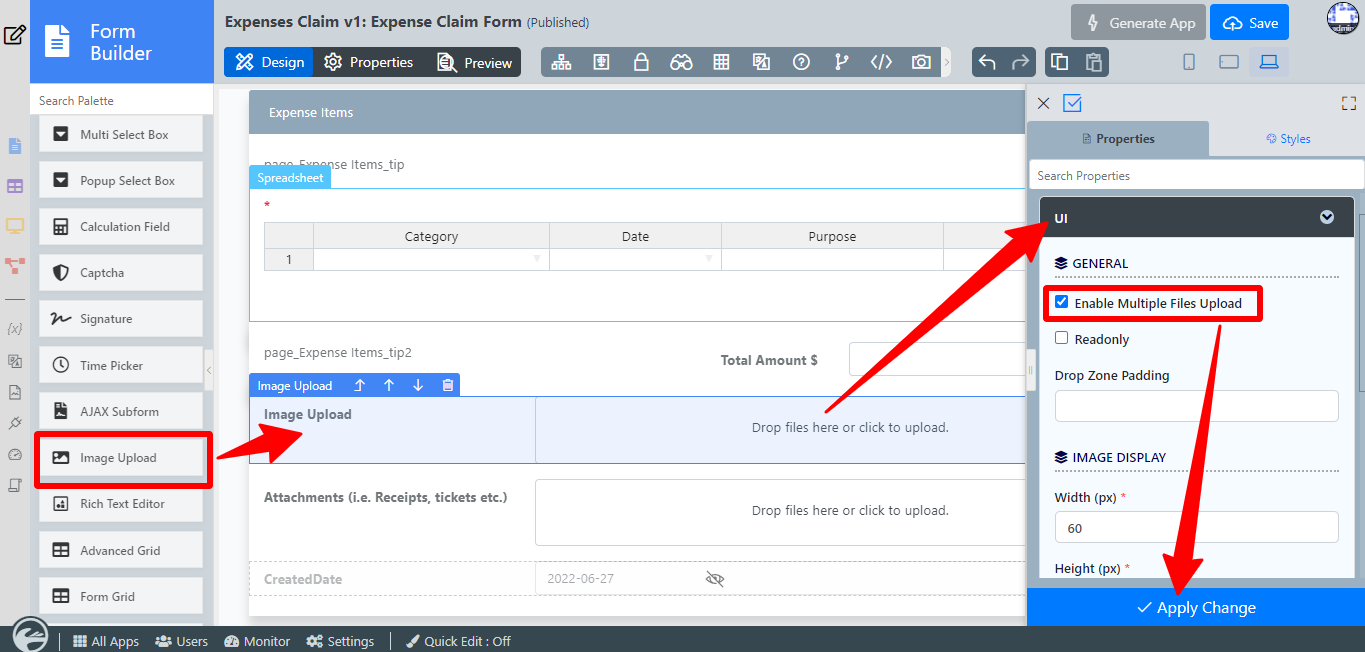
- Drag and Drop an Image Upload element on the canvas and click on it to open up the Image Upload properties.
- Click on UI, tick on Enable Multiple Files Upload checkbox and click OK.
Figure 2 - Click on Preview, click inside the box to upload or drag and drop images inside the box.
Image Upload Properties
Edit Image Upload
| Name | Description | ||
|---|---|---|---|
| Label | Element Label to be displayed to the end-user. | ||
| ID | Element ID (By declaring as "photo", a corresponding database table column "c_photo" will be created) Please see Form Element for more information about defining the ID and list of reserved IDs. | Label | Element Label to be displayed to the end-user . |
UI
General
| Name | Description | ||||||||||
|---|---|---|---|---|---|---|---|---|---|---|---|
| Allowed multiple files upload?Enable Multiple Files Upload | When checked, multiple files can be uploaded. | ||||||||||
| Readonly | Determines if the element is editable. | ||||||||||
| Drop zone padding | Determine the extra size of padding for the larger drop zone.
|
Image Display
| Name | Description |
|---|---|
| Width (px) | Width in integer |
| Height (px) | Height in integer |
| Create Thumbnail? | Determines if the element will create a thumbnail and show it below the upload file element after an image is uploaded. |
...
| Name | Description | |||||||
|---|---|---|---|---|---|---|---|---|
| Maximum Width (px) | If set, images will be resized to these dimensions before being uploaded.
| |||||||
| Maximum Height (px) | If set, images will be resized to these dimensions before being uploaded.
| |||||||
| Quality (Max 1.0) | set the quality of the resized image. | |||||||
| Method | sets how the images should be scaled down in case both Maximum Width (px) and Maximum Height (px) are provided. There are only two methods:
|
Permission
| Name | Description |
|---|---|
| Permission | Manage on who is able to access the file uploaded. Read more at Permission Control.
|


