Table of Contents
Introduction
The Grid enables one to capture structured and related data.
...
- Start the Joget Server and open the App Center.
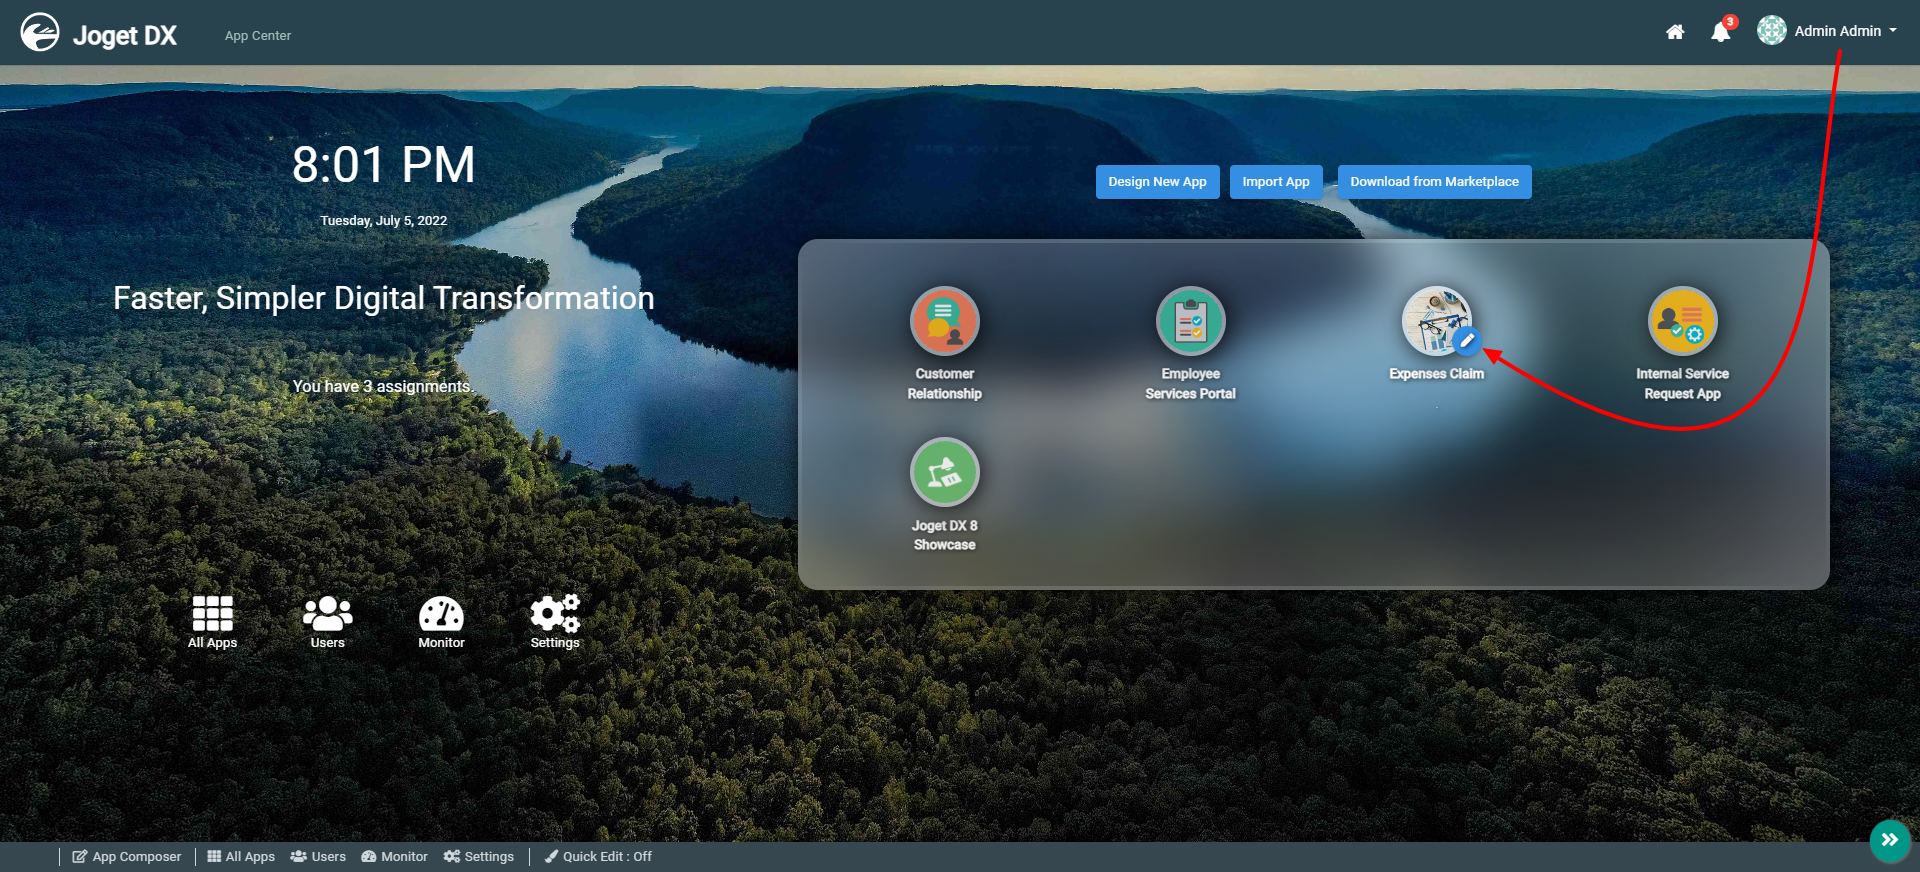
- Log in as admin and click on the pencil icon on the Expenses Claim to open the Design App Composer. (see Figure 1)
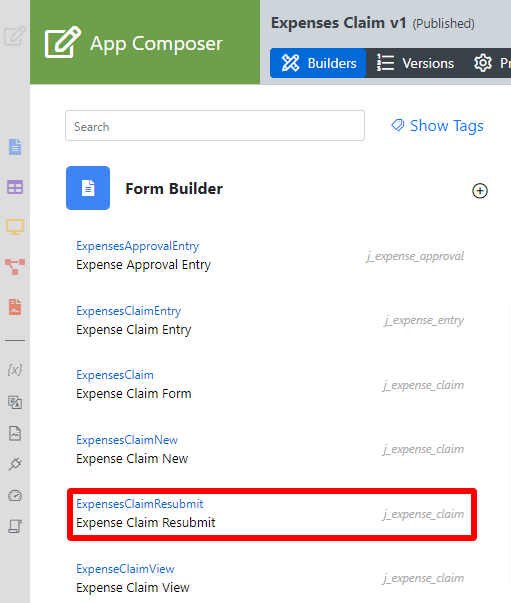
Figure 1 - Under FORMS Form Builder column, click on Expense Claim Resubmit (see Figure 2)
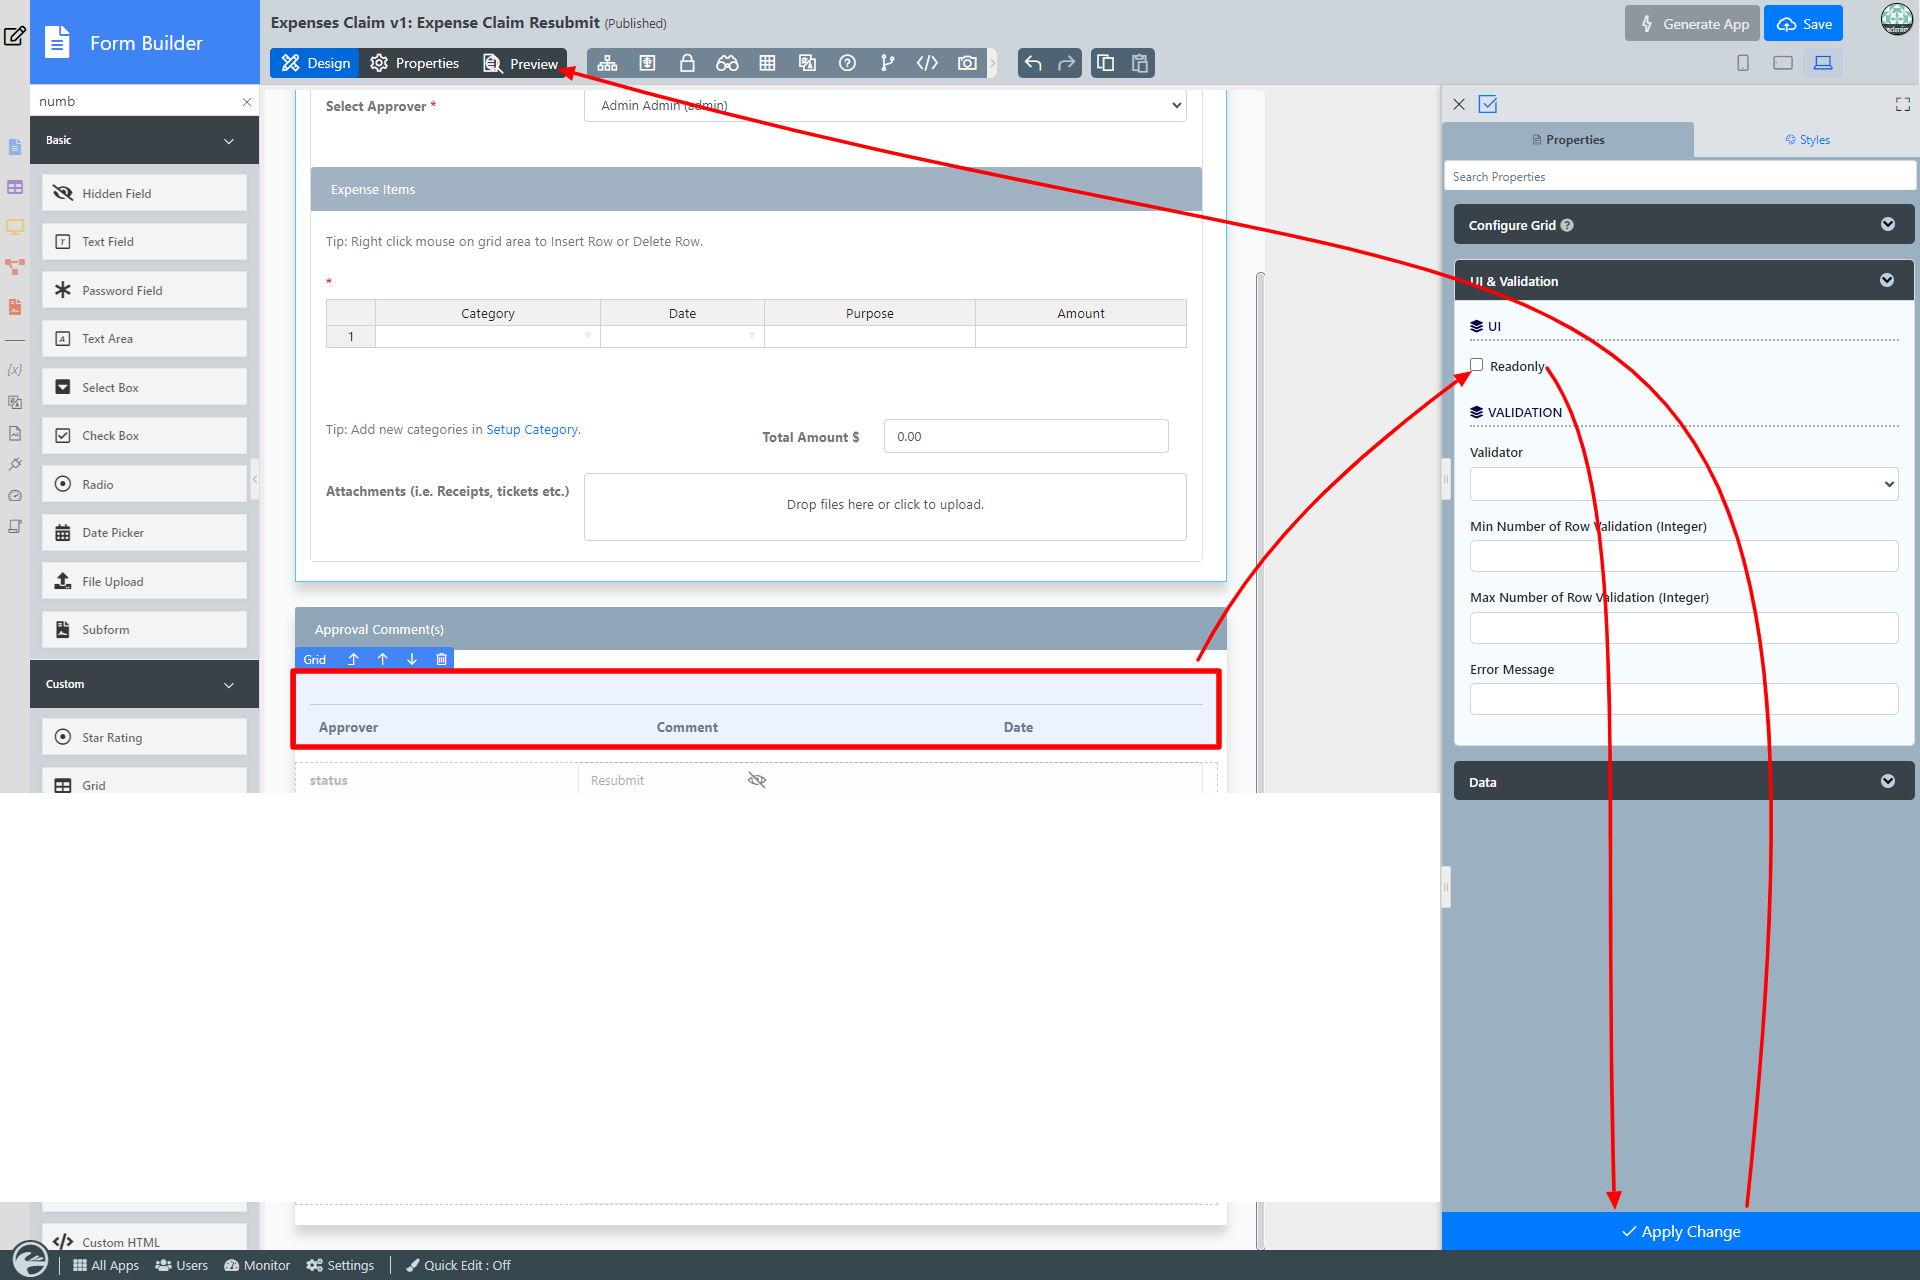
Figure 2 - Click anywhere on the Grid element on the canvas under Approval Comment(s) section to access the Property Editor.
- Click on UI & Validation, uncheck the Readonly checkbox and click Apply Changes . (see Figure 3).
Figure 3 - Click on Preview to open up the Preview tab, click on Click to edit to enter values and click on Add Row link to add more rows.
...
Figure 4: Configure Grid Properties
| Name | Description | ||
|---|---|---|---|
| Label | Element Label to be displayed to the end-user. | ||
| Options | Column definition and column label. The column name is defined in the Field ID column whereas the corresponding label is defined in the label column. | ||
| Field ID | Element ID (By declaring as "approval_comments", a corresponding database table column "c_approval_comments" will be created) Please see Form Element for more information about defining the ID and list of reserved IDs. | ||
| Label | Element Label to be displayed to the end-user | Options | Column definition and column label. The column name is defined in the Field ID column whereas the corresponding label is defined in the label column. |
UI & Validation
Figure 5 : Configure Grid - UI & Validation
...


