Table of Contents
Prerequisites
- An AWS Account
- Installed AWS CLI
Anchor jogetonecshttp jogetonecshttp
| jogetonecshttp | |
| jogetonecshttp |
...
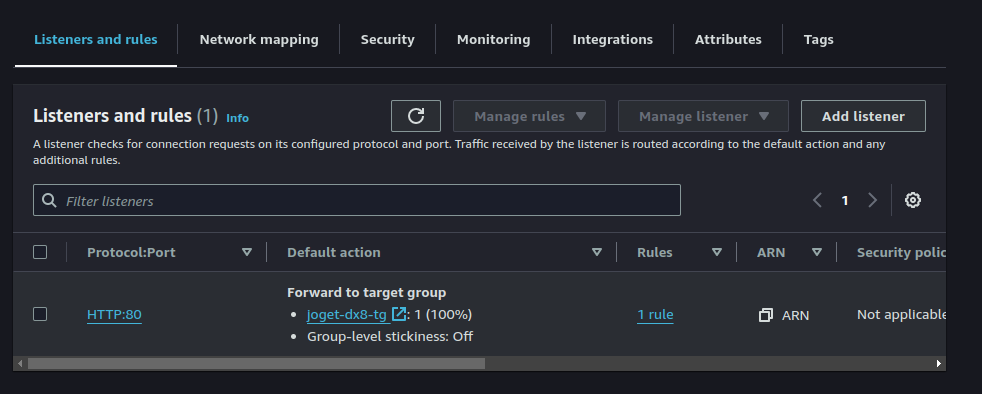
- Go to Target Group
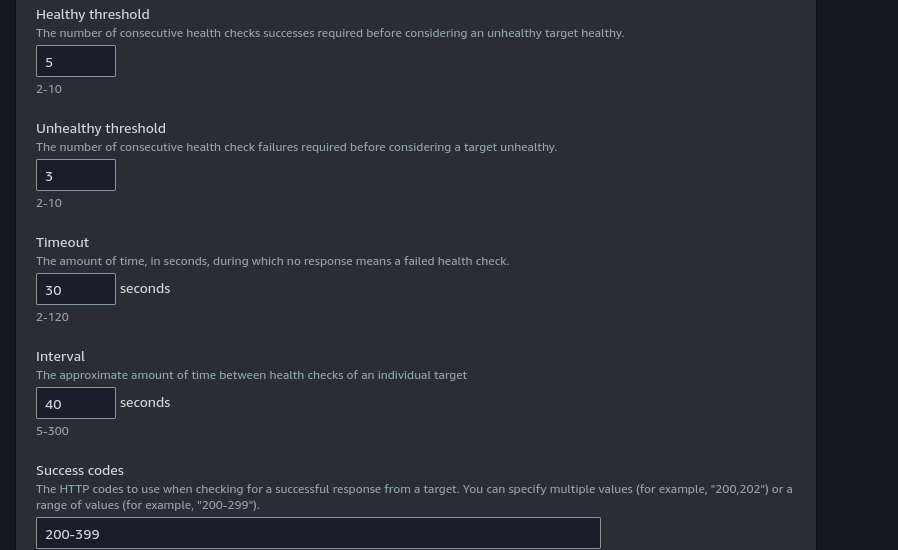
- Click on Health Check and click Edit
- Change the timeout to 30 seconds and interval to 40 seconds
- Update the healthy status code to 200-399
- Click Save Changes
Updating Permission on Joget wflow folder
Updating ECS Service to Allow execute-command
- Open CLI/Terminal
- Execute the following command:
Code Block language bash aws ecs update-service --service <ecs-service> --cluster <cluster-name> --enable-execute-command --force-new-deployment - Wait until the deployment is complete before proceeding to the next step. You can view the status through AWS Console
Accessing Container in ECS Task
- Go to ECS Cluster and click the cluster that has been created
- Go to Services tab and click the service that is in use
- Go to Tasks tab and click copy icon beside the Task ID
- Open CLI/Terminal
- Execute the following command:
Code Block language bash aws ecs execute-command --cluster <cluster-name> --task <task-arn> --container <container-name> --command "/bin/bash" --interactive
Note: container-name is name given to the container in Task Definition - Once accessed the task, run:
Code Block language bash chown -R tomcat:joget /opt/joget/wflow - Verify the ownership of the folder by running:
. Ensure that the owner would be tomcat instead of rootCode Block language bash ls -l /opt/joget
Note: You will only need to go through the above steps once as the folder will be shared through EFS
Accessing Joget Through Load Balancer
...
- Click on one of the Cluster on ECS Dashboard
- Under Services tab, click Create Service
- Under Compute Options, choose one - If you are planning to use multiple Infrastructure, choose Capacity Provider Strategy. If you are using only one type of Infrastructure, choose Launch Type
- On Deployment Configuration, choose Service as Application Type
- Choose the Task Definition create above on Family dropdown
- Enter the Desired Task number, depending on the load expected(Leave at one for testing purpose)
- Under networking, you may choose your own VPC if available. You can leave as default for testing
- Under Load Balancing, choose Application Load Balancer
- Create or choose Existing Load Balancer
- Enter or choose the Load Balancer name
- Enter 30 in the Health Check Grace Period
- For HTTPS, choose container 9080:9080
- Specify the Listener and the Target Group:
- Use port 9080 in when creating new Listener
- Use HTTPS protocol
- Choose the ACM Certificate that you have requested and validated
- Enter /jw on the Health Check path.
- Click Create
For further deployment steps, you may continue from here
...


