Typically, we would design a process that solely solve the main business problem like the example shown below. The process flow is designed with the exclusion of explicit tools for Sending out Email Notifications as this would unnecessary complicates the process flow design. Therefore, the User Notification plugin is used to address this requirement.
Figure 1: Typical process design flow.
Setting up the User Notification plugin
- Go to Properties and Export under your App.
- Go to Set Plugin Default Properties.
- Select User Notification.
- In the first tab, Configure User Notification. Configure the email server as required.
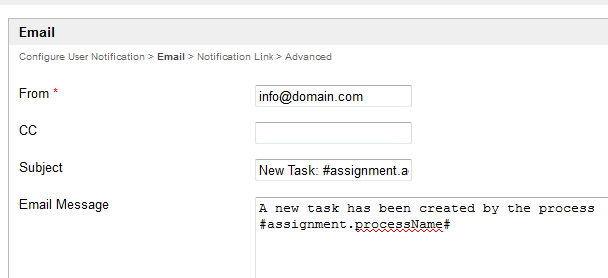
- Go to the second tab, Email. Customize your email template as needed. It should be a generic email template as it will be used for all activities under your App.
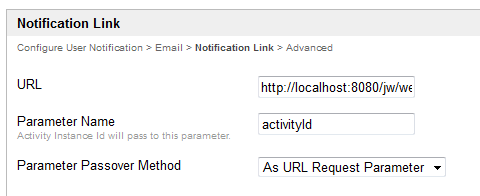
- Next, on the Notification Link tab, you will need to define the assignment link that will be shown at the end of the email message.
Link to Userview Inbox
If you would like to link it to your Userview's Inbox, then, get the absolute URL to the inbox and fill in under the URL field. Key in "activityId" in the parameter field and choose "As URL Request Parameter" in the "Parameter Passover Method" select box. - In the last tab, you may select on which activity that you would like to exclude from the Task Notification.
Note: The User Notification plugin is designed for all activities in a App and not to cater to selected few activities. Only one can be configured per App. Nevertheless, it is possible for you to manually handle the notification for a specific activity by placing a tool after a specific activity in your process design and exclude that activity in the Activity Exclusion list in the User Notification plugin.

