This tutorial cater for use cases that requires a highly customized spreadsheet.
The Spreadsheet form element uses the Handsontable library, specifically version 6.2.2 for Joget Workflow V6.
There are a wealth of plugins and APIs in the library documentation to change the cell appearance, cell selection, dynamic data, dynamic validation, and much more.
บทช่วยสอนนี้รองรับกรณีการใช้งานที่ต้องการสเปรดชีตที่กำหนดเองสูง
องค์ประกอบแบบฟอร์มสเปรดชีตใช้ไลบรารี Handsontable ซึ่งเป็นรุ่นเฉพาะ 6.2.2 สำหรับ Joget Workflow V6
มีปลั๊กอินและ API มากมายในเอกสารประกอบห้องสมุดเพื่อเปลี่ยนรูปลักษณ์ของเซลล์การเลือกเซลล์ข้อมูลแบบไดนามิกการตรวจสอบความถูกต้องแบบไดนามิกและอื่น ๆ อีกมากมาย
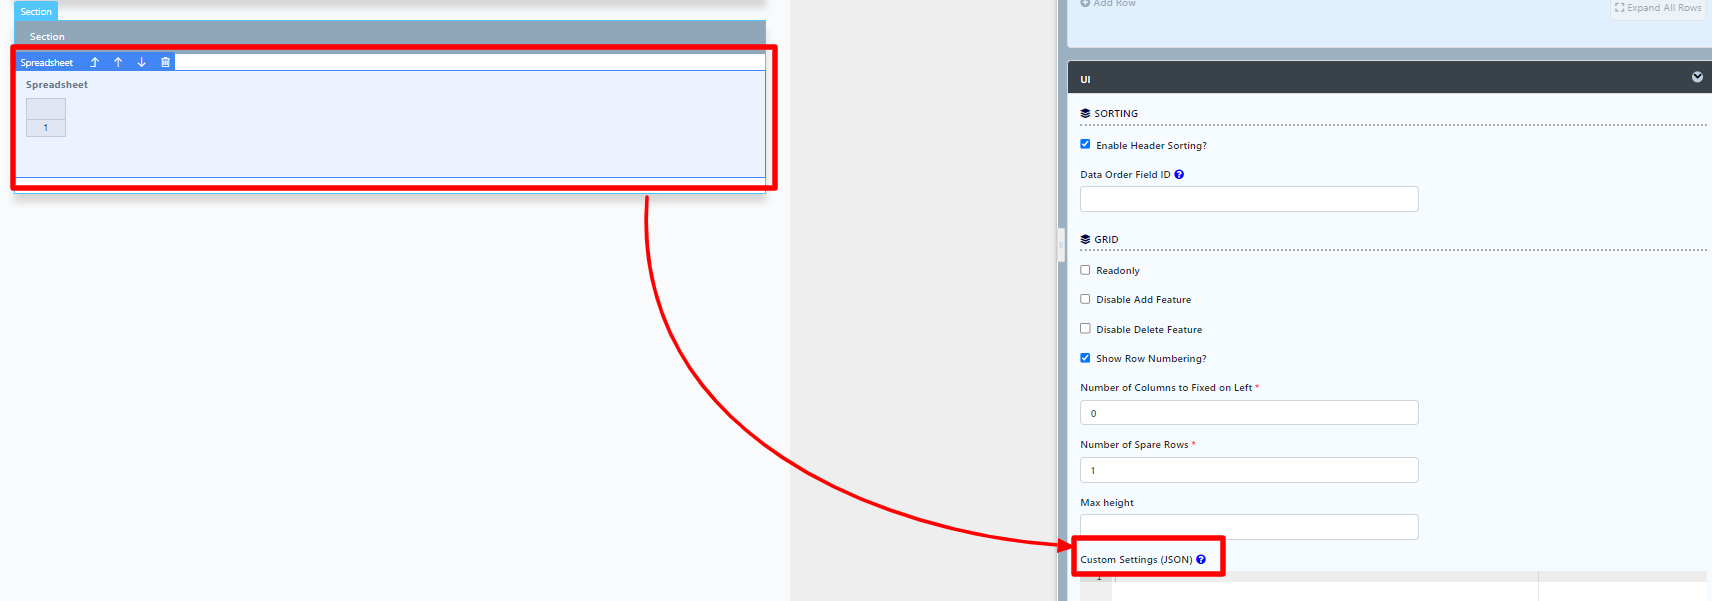
Figure 1 : Spreadsheet Form Element Properties - UI - Custom Settings
รูปที่ 1: คุณสมบัติองค์ประกอบแบบฟอร์มสเปรดชีต - UI - การตั้งค่าแบบกำหนดเอง
Example 1 - Limit Cell Selection
ตัวอย่างที่ 1 - จำกัด การเลือกเซลล์
Copy & paste this code snippet into Custom Settings.
คัดลอกและวางข้อมูลโค้ดนี้ลงในการตั้งค่าที่กำหนดเอง
{
    selectionMode: 'single'
}
Example 2 - Custom invalid cell style
ตัวอย่าง 2 - สไตล์เซลล์ที่ไม่ถูกต้องที่กำหนดเอง
First, use a Custom HTML form element to write a simple class style. Do use the !important notation only if the style is being overridden.
ก่อนอื่นให้ใช้องค์ประกอบฟอร์ม HTML ที่กำหนดเองเพื่อเขียนสไตล์คลาสแบบง่าย ใช้สัญลักษณ์! สำคัญถ้าสไตล์จะถูกเขียนทับ
<style>
	.invalidCellCustom {
		background:pink !important;
	}
</style>
Then, copy & paste this code snippet into Custom Settings.
จากนั้นคัดลอกและวางข้อมูลโค้ดนี้ลงในการตั้งค่าแบบกำหนดเอง
{
	invalidCellClassName: 'invalidCellCustom'
}
Example 3 - Get spreadsheet handsontable instance by form element ID
ตัวอย่างที่ 3 - รับอินสแตนซ์สเปรดชีตที่ทำด้วยมือได้โดยใช้ ID องค์ประกอบของฟอร์ม
First, copy & paste this code snippet into Custom Settings.
ก่อนอื่นให้คัดลอกและวางส่วนย่อยของรหัสนี้ในการตั้งค่าแบบกำหนดเอง
{
    "afterInit" : function() {
        var hot = this;
        $(hot.rootElement).data("hot", hot);
    }
}
Then, use a Custom HTML form element to get the 'hot' instance. After that, you are able to perform core functions on your specified spreadsheet element.
จากนั้นใช้องค์ประกอบรูปแบบ Custom HTML เพื่อรับอินสแตนซ์ 'ร้อน' หลังจากนั้นคุณสามารถทำหน้าที่หลักในองค์ประกอบสเปรดชีตที่คุณระบุ
<script>
	$(function(){
    	var hot = FormUtil.getField("_yourSpreadsheetFormElementIdHere_").data("hot");
		//console.log(hot.getSettings());
		//hot.setDataAtRowProp(0, '_yourcellColumnIdHere_', '_myNewValue_');
	});
</script>
Example 4 - Add New Row using Javascript
After performing example 3 above, we can use the script below to programmatically add new rows into the speadsheet.
	var col = hot.countRows();
    hot.alter('insert_row', col, 1);
    hot.setDataAtCell(col, 0, '-Name-');
    hot.setDataAtCell(col, 1, '-Surname-');
    hot.setDataAtCell(col, 2, '-Age-')
Reference: https://jsfiddle.net/ck4859zm/
