Description
If you are using an OVA (Open Virtualization Format) compatible virtualization platform such as VMWare or VirtualBox, you can download and use the OVA image.
The VM image contains a default installation of Joget Workflow on Apache Tomcat, MySQL and Ubuntu Linux.
All services have been configured to start on startup, and Joget Workflow is accessible via the URL http://IP_OF_VM:8080/jw
Product Versions
- Joget Workflow v6 Enterprise Edition 6.0.2
- Apache Tomcat 8.5.23
- MySQL 5.7.21
- Ubuntu 16.04.2 64-bit
Installing the VM
- Download the VM from SourceForge.
- Unzip the file and import the OVA file into your virtualization platform.
Modify the VM Settings (CPU, Memory, Network Adapter) as required. Typically, a bridged network connection is required for the VM to be accessible on the network (please refer to the Additional Notes section below for more details)
Start the VM.
The IP of the VM should display in the login screen if the VM is connected to the network. If no IP is available, login to Ubuntu and type "ifconfig" to obtain the IP address.
- From the web browser, access Joget Workflow using the URL http://IP_OF_VM:8080/jw.
Additional Notes
Joget Workflow Admin Login: admin / admin
Ubuntu Login: ubuntu / ubuntu
- MySQL Login: root / root
- Joget Workflow Path: /opt/joget
- Apache Tomcat Path: /opt/joget/apache-tomcat
- Tail Apache Tomcat Log File: tail -f /opt/joget/apache-tomcat/logs/catalina.out
- Start Apache Tomcat: sudo /etc/init.d/tomcat start
- Stop Apache Tomcat: sudo /etc/init.d/tomcat stop
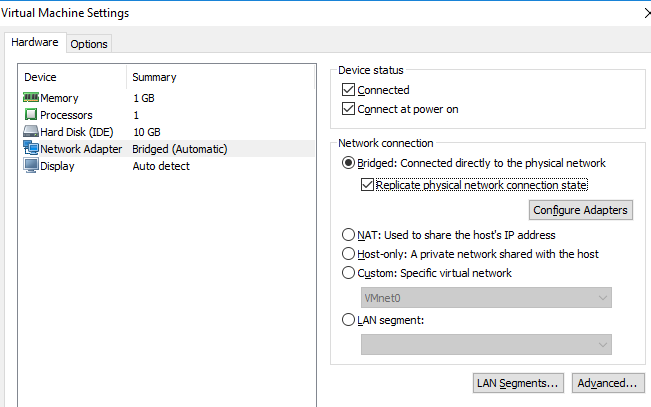
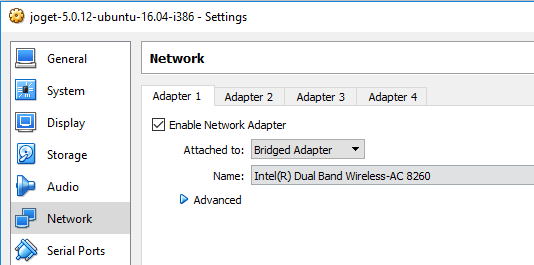
- Configure the network adapter from the default NAT to Bridged connection so that the instance can be accessible within your local network.
For example, on VMWare Player, select Bridged network connection.
On Virtualbox, select Bridged Adapter. - If there are problems obtaining a network connection, login to Ubuntu and configure the network as per https://help.ubuntu.com/lts/serverguide/network-configuration.html

